Monday, September 29, 2014

Healthy: Bruschetta with Tomato and Basil

Bruschetta is an Italian appetizer that focuses on letting fresh ingredients be fresh ingredients and deliver a big punch of flavor. It's simple to make and should not be over-thought or made overly complex by shoving in other ingredients. It's just tomato, balsamic vinegar, garlic and basil (ok, and a little salt and pepper) served on toast that has been brushed with olive oil and garlic. It should be light and flavorful by using a handful of fresh ingredients. It's a great option for a summer harvest of tomatoes, especially if you can find heirloom varieties that pack a bigger punch than the bland tomatoes you find at supermarkets. Some people opt to include cheese, olives and so forth but I do not find these additions necessary if quality ingredients are used.

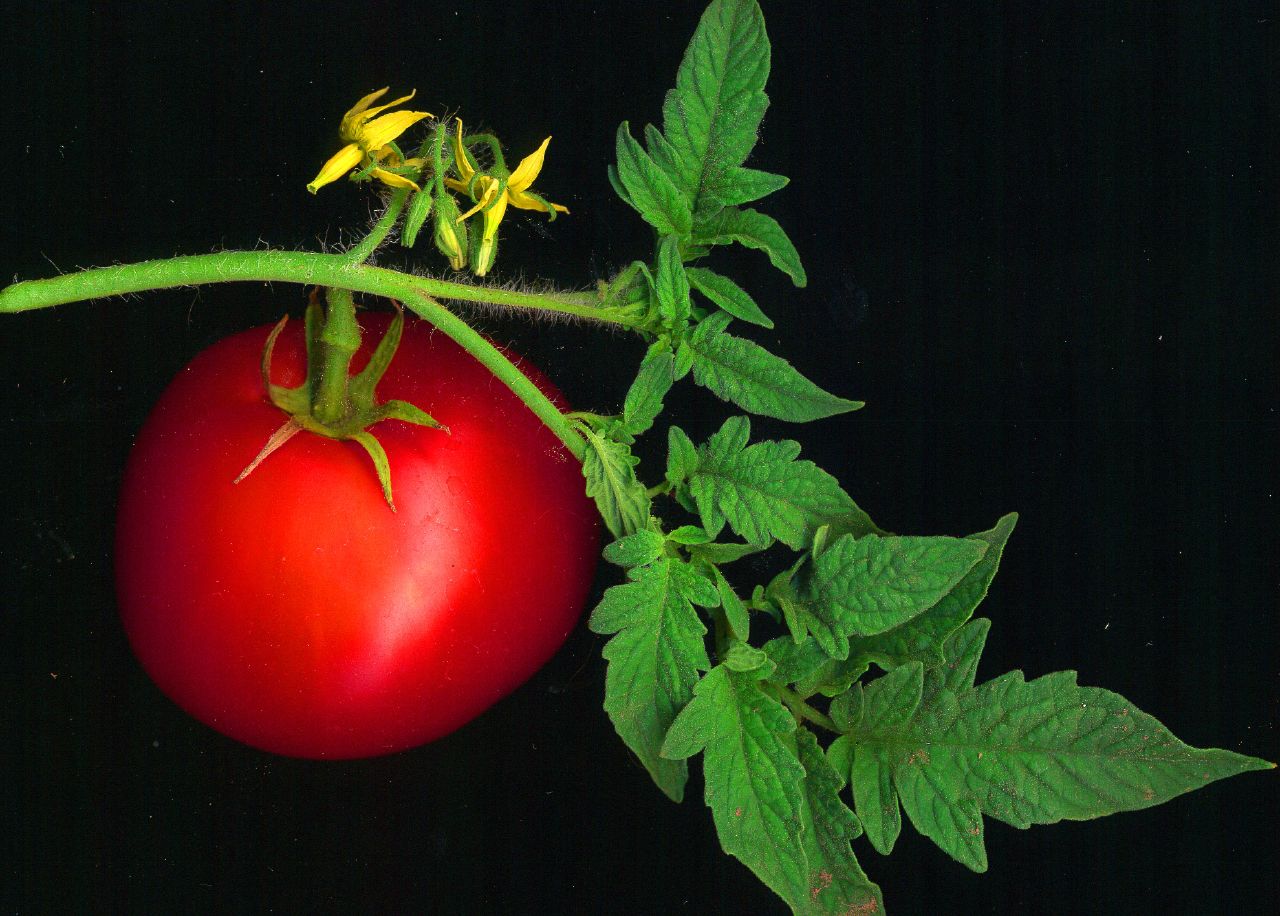
You typically find bruschetta recipes calling for roma tomatoes (or plum tomatoes, of which roma is a variety) but I tend to opt for beefsteak-type tomatoes (aka slicing tomatoes or slicer tomatoes) that have less liquid and a meatier texture so the tomato doesn't turn to mush quite as easily.  Avoid any tomato that is too juicy because you'll get a cold tomato stew rather than a bruschetta that you can pile on a piece of toast. As I said, I really prefer heirloom varieties that pack a big punch but their availability depends upon the content of your home garden plus whatever you can find at local farmer's markets. Sometimes the supermarkets carry a beefsteak variety or two during the late summer when the tomato harvest occurs.

White garlic is universal in grocery stores but there are interesting heirloom garlic varieties if you can find them (or grow them). I do recommend using fresh garlic and mincing it rather than using the jar stuff or worse, garlic powder. I don't mind using the pre-minced stuff out of the jar for some purposes but I find it doesn't work as well in dishes with less cook time.

Sweet basil (aka Italian basil) is the go-to basil in an Italian dish but do not be afraid to go with a different variety. Sweet basil can be fickle to grow while other bush varieties are incredibly easy to grow. I grow Thai basil and find it works well 90% of the time in Italian food. It has a bolder licorice/anise flavor to it which adds a nice punch to the bruschetta.

Balsamic vinegar. There are basically three types of balsamic vinegar: (1) the traditional and extremely expensive stuff; (2) the commercial grade less expensive stuff; and (3) completely fake stuff that is dirt cheap. Balsamic vinegar is made from pressed grape juice from Trebbiano grapes and then aged in barrels of different types of wood. The traditional and very expensive stuff is aged in a sequence of barrels for at least twelve years. Commercial grade balsamic is sold as "aceto balsamico di Modeno" or "balsamic vinegar from Modena". It is also made from Trebbiano grapes but it is not aged as long and typically is not aged in a sequence of different types of wood. The fake stuff is red wine vinegar with caramel coloring and sugar added to taste kind of like balsamic vinegar. Spend $10 and spring for the commercial grade stuff.

Bruschetta is typically served on toast brushed with olive oil and garlic and that is a tasty way to eat it. However, if you want to avoid some of the carbs you can enjoy it with lettuce or as a condiment on eggs, salads and so forth. Don't feel trapped into eating all the carbs.

Typically recipes call for removing the skin from the tomato and squeezing out the seeds and juice. I prefer to omit these steps. I try to use less juicy tomatoes where there is no need to squeeze and destroy the structure of the tomato and I think the skin adds texture and flavor. If you want you can quickly blanch the tomatoes and peel the skin.

Bruschetta with Tomato and Basil Recipe

Details:

Servings: Enough to serve with 24 slices of a baguette
Prep time: 15 minutes
Cook time: 20 minutes

Equipment:

  • Oven
  • Sauce pan
  • Mixing bowl
  • Kitchen utensils, measuring cups and spoons
  • Knife and cutting board
  • Pastry brush (optional)
  • Baking sheet

Ingredients:

  • 1 1/2 lb. tomatoes
  • 4 garlic cloves
  • 1 tbsp olive oil
  • 1 tsp balsamic vinegar
  • 6-8 fresh leaves of Italian basil (or a comparable amount of Thai basil)
  • 1/2 tsp salt
  • 1/2 tsp pepper
  • 1 baguette French bread or Italian bread
  • 1/4 cup olive oil for bread (optional)

Directions:

  1. Remove the core of the tomatoes and chop the remaining fruit into small cubes.
  2. Preheat the oven to 450F. 
  3. Mince 2 of the garlic cloves and mix with the tomatoes, 1 tbsp olive oil and balsamic vinegar in a mixing bowl.
  4. Chop the basil into thin slices.
  5. Add the basil, salt and pepper to the mixing bowl. Mix well and taste. If necessary, add more salt and/or pepper.
  6. Cut remaining garlic cloves in half.
  7. Slice bread into half-inch thick slices. Rub one of the garlic cloves with the cut side of the clove on each slice. Give it a good coating of garlic. As the garlic wears down move on to another clove. 
  8. In addition to or instead of the last step, brush a thin coat of olive oil on the side of each slice where you rubbed the garlic.
  9. Place the slices olive oil/garlic side down on a baking sheet. 
  10. Toast bread in oven on the top rack for 5-6 minutes until lightly browned on the edges.
  11. Serve bread on plate with bowl of bruschetta.
Bruschetta will stay good in the fridge for several days. You may find an increasing amount of liquid pooled in the bottom of the container. You can drain and discard or drink as a nice light tomato juice.


Not Healthy: Banana Bread Beer Banana Bread Recipe

You might have needed a few passes to get through that title. It is a banana bread made with banana bread-flavored beer. So it's basically bread made with beer that tastes like the bread it is making. The beer used for this particular recipe is Well's Banana Bread Beer, which tastes pretty much identical to what banana bread would taste like in liquid form. It is a fairly sweet beer, which makes it too sweet for my drinking preferences but it makes an excellent, moist, super banana-y bread. So while regular banana bread can be a semi-healthy, this banana bread recipe is less healthy. However, it will really impress banana bread fans.

This recipe will work as one large loaf or multiple smaller loafs. The smaller the loaf the quicker it will bake so adjust baking time accordingly.

Banana Bread Beer Banana Bread Recipe

Details:

Serves: Lots.
Prep time: 15 minutes
Cook time: 40-50 minutes
Cooling time: 20 minutes

Equipment:

  • Oven
  • Kitchen utensils, mixing bowls, measuring spoons and cups
  • Bread pan(s)
  • Cooling rack (optional)

Ingredients:

  • 3 cups all-purpose flour
  • 1/2 cup brown sugar
  • 1/2 tsp salt
  • 1 tsp baking powder
  • 1/2 tsp baking soda
  • 1 tsp vanilla extract
  • 1 12 oz. bottle of Wells Banana Bread Beer (or one 500ml bottle and drink 4 oz.)
  • 3 ripe bananas
  • 4 tbsp butter
  • Cooking spray (or extra butter to grease pans)
  • 1/2 cup walnuts, chopped

Directions:

  1. Preheat oven to 350F.
  2. Apply cooking spray (or butter) to bread pan(s) to grease the inside.
  3. Melt butter in microwave, approximately 30 seconds.
  4. Coarsely chop walnuts if not purchased pre-chopped. 
  5. In large mixing bowl, mix flour, walnuts, sugar, salt, baking powder and baking soda.
  6. In another medium or large mixing bowl, mash bananas to smooth consistency. Add vanilla, half of the melted butter and all of the beer. 
  7. Combine contents of both bowls into the largest bowl. Stir until combined to an even texture and wetness. The banana may break up but not meld smoothly. This is ok. Avoid over-working the dough to prevent activating gluten.
  8. Spoon dough into bread pan(s). Ideally you want the top of the dough just below the top of the bread pan(s).
  9. Bake 40-50 minutes. Check at 40 minutes by sticking middle of loaf with toothpick or knife. If it comes out clean, it is done. If not, continue to bake 5 minutes and recheck. Continue to bake and recheck every five minutes until done.
  10. Once baking is complete, remove from oven and transfer loaf from the bread pan to a cooling rack (or at least a cool surface). Cool 20 minutes. Slice and serve.

Options:

I don't think the recipe requires chocolate, which is sometimes found in banana bread, but if you want to add chocolate chips then 1/2 cup will get you a nice chocolate flavor without overwhelming the banana.

You can try other beers for different flavors but they won't give you as much banana flavor. Brown ales, bocks, porters and dunkelweizens would be interesting substitutions. Avoid anything too hoppy as cooking down the bittering compounds can make an intensely bitter food.

Not Healthy: Plum and Almond Tart Recipe

Tarts are fun English desserts on the healthier side of desserts with a focus on sweet fruit flavors rather than heavy cream or loads of sugar. Make no mistake, this dessert is sweet but it is nicely balanced by the fruit acidity and uses far less sugar than most other baked treats. You can serve a tart with ice cream or creme fraiche but it's perfectly good on its own and you can save some calories that way. Plum and almond is a solid flavor combination for English desserts and this recipe presents the sweet stonefruit and almond flavors in multiple ways to create a complex dessert out of a simple process.

This recipe calls for halving the plums so you get big pockets of plum full of delicious juice but you can also cut the plum into slices and spread them out for a more even plum distribution.

Plum and Almond Tart Recipe

Details:

Serves: 6-8
Prep time: 20 minutes
Cook time: 40 minutes

Equipment:

  • Oven
  • Kitchen utensils
  • Measuring cups and spoons
  • Rolling pin
  • Mixing bowls
  • Large baking sheet
  • Foil

Ingredients:

  • 1 packet pre-made puff pastry 
  • Icing sugar (can use regular sugar)
  • 9 oz marzipan
  • 1 1/2 lb large ripe plums, halved and stoned
  • 2 tbsp brandy
  • 1/2 tsp almond essence
  • 1 oz brown sugar
  • 1/4 tsp ground cinnamon
  • 1 oz butter, cut into small pieces
  • Cooking spray

Directions:

  1. Halve the plums.
  2. Preheat the oven to 375F.
  3. Spray baking sheet with cooking spray.
  4. Roll out the puff pastry into a large rectangle. Prick the puff pastry all over with a fork. Using a sharp knife, score a line one inch from the border on all sides. Do not cut all the way through the pastry, just score about halfway through. This will help create a border for the tart. Transfer pastry to baking sheet.
  5. Dust the work surface with a light dusting of icing sugar. Roll out the marzipan into a thin sheet and lay it on the pastry. The layer should be thin enough that it covers all or almost all of the pastry inside the scored border. 
  6. Cover the marzipan with the plums, cut side down.
  7. Mix the brandy and almond essence in a bowl. Drizzle this mixture over the plums. 
  8. Combine the brown sugar and cinnamon in a bowl and sprinkle over the plums.
  9. Cut the butter into small pieces and place on top of plums. 
  10. Bake for 40 minutes. Check approximately 25 minutes into bake. If the border is getting too brown, place strips of foil on the border for the remainder of the time in the oven.
  11. Serve warm.

Thursday, September 25, 2014

Not Healthy: Molten Lava Cake

Molten lava cakes (sometimes called molten chocolate cakes) are popular dessert options at restaurants for good reason: they are delicious. However, they are an incredibly easy dessert to make at home. It is perhaps one of the easiest desserts to make because it's just a half-cooked flourless chocolate cake. Seriously. You are shooting for an undercooked cake. This recipe comes from the man who popularized the dessert in the US (and claims to have invented it).

These cakes are easily made with the use of one cup ramekins but if you don't have any at your disposal then you can try to do this with basic coffee cups although I am not sure they will come out of the coffee cups in one piece like they will in a ramekin.

You want to use a double boiler to melt the chocolate. You can make a double boiler by partially filling a medium saucepan with water and bringing it to a boil with a smaller saucepan floating in the water. You put the chocolate in the smaller saucepan (make sure the water does not pour in) so you can heat the chocolate without applying direct heat. If you have a metal mixing bowl or saucepan that fits on top of the saucepan with water then you can also put the vessel holding the chocolate on top.

Molten Lava Cake Recipe

Details:

Servings: 4
Prep time: 20 minutes
Cook time: 12 minutes

Equipment:

  • Oven
  • Mixing bowl
  • Kitchen utensils
  • Measuring cups and spoons
  • 4 one cup ramekins
  • Whisk
  • Double boiler
  • Baking sheet
  • Mixer (optional)

Ingredients:

  • 4 oz unsalted butter
  • 1 tbsp butter
  • 6 oz bittersweet chocolate
  • 2 eggs
  • 2 egg yolks
  • 1/4 cup sugar
  • 1/8 tsp salt
  • 2 tbsp flour

Directions:

  1. Preheat oven to 450F. 
  2. Use 1 tbsp butter to apply a thin coat of butter to the interior of the ramekins. Set ramekins on baking sheet.
  3. Bring water to boil in double boiler and melt chocolate with unsalted butter.
  4. In a mixing bowl mix the sugar, eggs, egg yolks and salt until thick.
  5. Whisk the chocolate until smooth and butter is fully mixed. Fold in the egg mixture--it does not have to be fully mixed. 
  6. Spoon the mixture in equal amounts into the ramekins. Gently tap the ramekins on the baking sheet to even the batter.
  7. Bake for 12 minutes.
  8. Remove from oven and let stand for 1 minute.
  9. Place a plate upside down on the ramekin and flip the plate and ramekin over (use oven mitts!) so the cake will slide out and sit upside down.
  10. Let ramekin sit for 10-15 seconds and then carefully pull up to release cake.
  11. Serve immediately
Options: molten lava cake is often serves with a thin dusting of powdered sugar and vanilla ice cream but you can also experiment with drizzling with various sauces like chocolate sauce, raspberry sauce, caramel sauce and so on. You can also incorporate other flavors into the cake like coffee, orange, raspberry, mint, cherry and so on.

Healthy: Spicy Cauliflower (Indian)

One thing I really enjoy about Indian food is the ability to transform seeming boring ingredients into vibrant dishes without requiring frying or heavy amounts of salt that one might find in American or European cuisine. Turning vegetables into spicy dishes seems to be a popular technique among Indian cuisine. Of course, not everybody necessarily enjoys the flavor combinations and this particular dish is one my wife strongly dislikes. It is a nice side dish and works as a filing for various wraps or mixed with rice or dal (lentil) it can become a main course. This recipe is simple and relies upon a handful of spices. There are more complex versions of this recipe floating around but they usually produce something with more liquid and I like that this is a drier dish as it improves the versatility.

Spicy Cauliflower/Spicy Gobi Recipe

Details:

Serving: 4-6
Prep time: 40 minutes
Cook time: 20 minutes

Equipment Needed:

  • Cutting board and knife
  • Oven and stove
  • Large pot
  • Baking sheet
  • Measuring spoons and cups
  • Kitchen utensils
  • Large mixing bowl

Ingredients:

  • 1 large cauliflower head
  • 1-2 tbsp oil
  • Lime juice (optional)
  • Cilantro, loosely chopped (optional)
  • 1 tbsp coriander powder
  • 1 tsp cumin powder
  • 1 tsp red chili powder
  • 1/2 tsp tumeric
  • 1 tsp garam masala (may need more, optionally)
  • 1 tbsp dried fenugreek leaves
  • 1/2 tsp dried ginger powder
  • 1 tsp salt

Directions:

  1. Boil enough water in pot that it will completely cover the cauliflower.
  2. Chop Cauliflower head into quarters and add to boiling water. Add salt and tumeric.
  3. Boil for five minutes.
  4. Drain water and transfer cauliflower to mixing bowl. Break up the florets into smaller pieces. Use knife to chop if necessary.
  5. Add oil and remaining spices from coriander powder to dried ginger powder. Mix well to coat cauliflower. May add more garam masala to taste if you want.
  6. Let marinade for 30 minutes. After 20 minutes, turn on oven to preheat to 350F.
  7. Arrange cauliflower on baking sheet so there is a single layer of cauliflower. 
  8.  Bake for 10 minutes. Remove, turn cauliflower and bake for another 10 minutes.
  9. Once done, drizzle with lime juice and serve with cilantro.

Thursday, September 18, 2014

Not Healthy: Cherry Kuchen

Kuchen is German for "cake" but like many German words it has multiple meanings and the specific meaning must be derived from its context. It has translated into the American lexicon, particularly in areas of significant German settlement, to mean a coffee cake. It often appears with a strussel topping and there are multiple variants (if you don't believe me, look around the internet). Variants range from creamy, sweet pie-like variants with a custard filling to recipes with more of a firm cake-like texture. This recipe is a yeast-raised cake with a firmer texture. There is a basic strussel topping in the recipe that you can omit if you want or replace with a more involved and complex strussel. You can also sub out the canned fruit for fresh fruit or other canned fruit. Be careful about not using canned pie filling as this will add a lot of sugar to the cake and make it too sweet. This recipe will take some time to put together because it relies on the yeast to raise the dough so it works as a good brunch recipe or you can make it the day before you plan on serving it. It will last a few days.

Cherry Kuchen Recipe

Details:

Servings: 6-9
Prep time: 35 minutes
Cook time: 20-25 minutes

Equipment:

  • Oven
  • Measuring spoons and cups
  • 9x9 glass or metal baking dish (glass preferred)
  • Fork
  • Hands
  • Mixing bowls

Ingredients:

  • 1 egg
  • 3/8 cup of water
  • 1 package dry yeast
  • 2 3/4 cups all purpose flour
  • 1/2 tsp salt
  • 1 tbsp sugar
  • 1/4 cup butter
  • 1/8 cup butter
  • 1 can pitted tart cherries, drained
  •  1/4 cup sugar

Directions:

  1. Beat egg. Preheat oven to 400F.
  2. Add water and yeast to beaten egg and refrigerate for 15 minutes.
  3. Meanwhile, blend 2 cups flour, salt, 1 tbsp sugar and 1/4 cup butter with a fork or pastry blender.
  4. In a large bowl, add flour mix from last step and yeast mix from second step. Knead until smooth. Form into a dough ball and let sit for twenty minutes.
  5. Once risen, roll the dough out in your 9x9 baking dish. Work the dough up the sides of the dish.
  6. Pour cherries on dough so there is an even layer.
  7. In a mixing bowl, mix the remaining 3/4 cup flour, 1/4 cup sugar and 1/8 cup butter together. It will form a clumpy mix. Break this up into small pieces with a fork or knife and sprinkle over the cherries.
  8. Bake 20-25 minutes until topping turns golden.

Wednesday, September 17, 2014

Healthy: Roasted Green Beans

Growing up green beans were these terrible canned green sticks my parents dumped on my dinner plate that tasted like metal. It took me a long time to get over the taste of those canned green beans before I could enjoy them again. Even now, I sometimes hesitate to eat green beans out of a fear that they will conjure up that terrible flavor. However, this recipe is an easy, healthy way to transform green beans into a delicious side dish that is very difficult to screw up. It's not quite as low calorie as steaming vegetables but on the other hand you aren't leaching out the vitamins like you do when you steam or boil vegetables. You can add other herbs or spices as you desire. I like to keep it simple but feel free to mix it up. You can use any kind of green beans. I particularly like french spring beans.

Roasted Green Beans Recipe

Details:

Serving size: 4
Prep time: 10-15 minutes
Cook time: 12-15 minutes

Equipment:

  • Oven
  • Cooking sheet
  • Measuring spoons
  • Kitchen utensils
  • Knife (optional)
  • Large mixing bowl

 Ingredients:

  • 1 lb. green beans
  • 1-2 tbsp olive oil (or grape seed oil)
  • 1/2 tsp black pepper
  • 1/2 tsp salt
  • Cooking spray (or extra oil)

Directions:

  • Preheat the oven to 425F. 
  • Remove the tips of the green beans, if appropriate for the type of green beans you purchased.
  • Put green beans in mixing bowl and mix with olive oil. Add salt and black pepper and continue to mix until green beans are thoroughly covered. If you do not have a light coat on all beans, add olive until covered.
  • Optional: spray cooking sheet with cooking spray or apply a thin coat of oil to cooking sheet. Will help prevent sticking.
  • Spread green beans out on cooking sheet.
  • When oven is at 425F, add green beans and bake for 6 minutes. Remove green beans, stir and spread back out. Return to oven for 6-9 minutes until roasted.

Here is a more involved recipe that includes a sauce and some other ingredients: http://cafejohnsonia.com/2012/04/pan-roasted-green-beans-with-roasted-red-pepper-sauce.html

Thursday, September 11, 2014

Healthy: Hatch Chile Pork Stew (Chile Verde)

Photo courtesy of wikipedia.com
Hatch chile "season" in Texas is August, which coincides with the harvest of these long, green chiles from Hatch, New Mexico. Hatch chiles are a common ingredient/condiment in New Mexico but we go hog wild for them each August here in Texas. You can find them in all sorts of dishes for about a month and then it's pretty hard to find them any other time of the year. They are found fresh and roasted (and in rare cases roasted and then dried like guajillo peppers). You can often find them in hot and mild varieties. Hatch chiles are related to Anaheim although they are meatier with a more robust flavor. In my opinion, they are somewhere between Anaheim and Poblano.

I grow hatch chiles in my backyard so I get to enjoy them all summer and into the fall. In spite of my luck growing them, I still stock up in August when they flood the stores so I can go nuts with them. I shove those chiles into everything from scrambled eggs to ceviche. One of my favorite ways to enjoy hatch chile is in a stewed preparation of either a stew or chili. Hatch chile stew is an iconic New Mexican dish for an excellent reason. It is delicious. This particular recipe is for hatch chile pork stew and the basis for the recipe comes from an old Central Market recipe. The recipe is simple and reasonably healthy. It will freeze well so you can enjoy it throughout the year. I'll drop a few suggestions for the recipe before getting right to it:

  • This recipe called for roasted hatch chiles. If you can only find them fresh then you can roast them in your oven. You lose that hint of smoke you get from hatch chiles roasted over a fire but I do this with my own chiles and I promise it will still be delicious. Just throw them under the broiler on a cooking sheet for seven or so minutes until the skin is charred.

  • If you cannot find hatch chiles then you can still make a green chile stew but I don't think you'll get the right flavor by substituting something else. Even Anaheim, in my opinion, taste too different and lack the depth of flavor to get it right. There are canned hatch chiles out there that will work fine. Otherwise, if you live somewhere that hatch chiles are available after the harvest then I suggest stocking up and freezing them.
  • Many hatch chile stews call for tomatillo although this recipe does not. If you want to use some tomatillo for flavor or sweetness then they will work in this recipe. I'd suggest roasting them in the oven as well but that is optional. I'd substitute some of the tomato for tomatillo if you want to add tomatillo.

  • The heat level on this dish is medium. It's not going to make your mouth en fuego (in my opinion) but if you make it and find the dish is too spicy then you can mix in some sugar to try to balance it out. Or learn to love the heat.

  • My preferred pork choice is pork sirloin tip roast but pork butt is the typical cut for this dish. I like a healthy cut and I can find the sirloin tip roast at Costco for a good price so that's what I use. It doesn't pull apart like pork butt but it's leaner. Feel free to substitute my choice for whatever you like. A fattier cut will make the dish less healthy but help balance the heat if that is a concern for you. 

Hatch Chile Pork Stew (Chile Verde)

Details:

Serves 6-8
Prep time: 15-20 minutes
Cook time: Approximately 1 hour 45 minutes

Equipment: 

  • Cooking sheet (if roasting chiles)
  • Knife and cutting board
  • Measuring cups and spoons
  • Dutch oven or large stock pot
  • Kitchen utensils

Ingredients:

  • 2lb. pork sirloin tip roast, cubed into 1" cubes (does not have to be exact)
  • 2 1/2 cups low sodium chicken broth
  • 2 tbsp olive oil
  • 1/2 cup yellow onion, chopped
  • 1 clove garlic, minced
  • 1/4 cup flour
  • 2 1/2 cups tomato, chopped
  • 2 cups roasted hatch chiles, peeled and chopped (leave whole to roast, then peel and chop)
  • 1 tsp salt
  • 1/2 tsp pepper
  • 2 Russet potatoes cubed into 1" cubes

Recipe steps:

  1. If chiles are not pre-roasted then roast in oven under broiler for seven minutes or until skin is well-charred.
  2. Prepare vegetables and meat.
  3. Heat olive oil over medium heat.
  4. Add pork and brown pork on all sides.
  5. Add onion and garlic and saute 3-4 minutes.
  6. Add flour and mix thoroughly, cooking for an additional 1-2 minutes until thoroughly mixed. Liquid should have thickened.
  7. Add tomatoes, salt, pepper, chiles and sugar. Mix well.
  8. Stir in potatoes and add broth. Mix well. 
  9. Reduce heat to medium-low to simmer. Cover and simmer for 1.5 hours.

Thursday, September 4, 2014

Healthy: Braised Endives

Braising is a common technique for making bitter greens like Belgian endive less bitter and more rich, creating a complex vegetable dish out of just a few ingredients. It's hard to screw up, which makes it a safe bet for people trying to create a nice meal without a massive array of ingredients or difficult techniques. Braising endives is no exception.

This recipe is simple and reasonably healthy. You can take this simple base recipe and make it richer (and in turn less healthy) by substituting chicken stock, duck stock, or white wine instead of water. You can also add herbs like thyme or tarragon to make it more interesting. Many recipes floating around the internet call for a lot more butter than this. Personally I find too much fat washes out the flavor and destroys the balance of bitterness from the endive so if I want a richer dish I will opt for using white wine rather than more fat.

Braised endive works well as a side dish with both poultry and fish. It is probably most common with fish but you can serve it successfully with chicken, duck, or Cornish hen. French, Belgian, Dutch and English poultry or fish dishes can work with braised endive. It also pairs nicely on a plate with squash, potato and other earthy-tasting vegetables.

Braised Endive Recipe

Details:

Serving: 4
Prep time: 10 minutes
Cook time: 40 minutes

Equipment:

  • Dutch oven, frying pan (with lid), medium-sized pot (with lid), or saute pan (with lid)
  • Kitchen utensils
  • Measuring spoons and bowls
  • Knife and cutting board
  • Stove

Ingredients:

  • 10-12 Belgian endive
  • 2 tbsp butter
  • 1 tbsp lemon juice
  • 1/4 tsp salt
  • 1/3 cup water (or stock or white wine)

Recipe steps:

  1. Cut the endives in half. Then remove the hard base of each endive, trying to leave the rest of the endive intact. 
  2. Melt the butter in your chosen cooking vessel over medium heat
  3. When the butter is melted, lay the endives in a single layer in the butter. 
  4. Sprinkle the lemon juice over the endives. Then sprinkle the salt over them.
  5. Gently pour the water down the side of the cooking vessel so you don't wash off the salt or juice.
  6. Reduce heat to low and place the lid on the cooking vessel. 
  7. Braise (cook) for thirty minutes.
  8. The endives should be tender. Remove the lid and turn the heat up to medium.
  9. Let the liquid evaporate and the endives will start to brown. Turn endives until all sides have browned.
  10. Remove and serve.

Wednesday, September 3, 2014

Not Healthy: Cheese Souffle

Souffle is a dish that strikes fear into the hearts and minds of home cooks everywhere. It's used on cooking shows like Masterchef as a high-stakes test for good reason. It takes many simple ingredients and transforms it into something magical purely by technique. It is 100% a test of your technique that thrives or dies in the oven. It should rise like an ominous force and then bake over into a nice browned crust. The true test of a well-made souffle is not how light it is but how long it stands erect.

Because it is a technique-heavy dish, you can expect your first few to come out imperfect but still delicious. I can almost guarantee whatever comes out of your oven will be something you will want to eat. You will improve as you get the timing down to move from step to step. I will help shorten your learning curve by giving you plenty of helpful tips to transform a very simple recipe into something very elegant.

Souffle is not as complex or difficult as you might imagine. It is just egg whites mixed with a sauce. Seriously. That's it. The problem is that you have to get a lot of basic ingredients right to make the sauce and egg whites rise and stand tall. But you can do it. A cheese souffle begins life as bechamel sauce. Then cheese is added to form cheese sauce. Then egg whites are added and it is baked. You are really dealing with those basic steps although each has its own component steps. However, by thinking about these few steps you allow yourself to keep the process more manageable. When you become comfortable with the basic steps and recipe then you can start to challenge yourself by adding extra steps, such as making a more complex bechamel or adding herbs and spices to the cheese sauce. This recipe will make an excellent dish without getting too complicated.

In addition to adding herbs and spices to the recipe to make it a unique and complex souffle, you can also change up the cheese and/or add other ingredients. It is not uncommon to find cheese souffles with sausage or vegetables like mushrooms added. These ingredients can change the consistency of the souffle so I recommend making those adjustments once you feel comfortable with the basic process. Mixing up the cheeses is the most forgiving alteration you can make and I encourage you to play around with the cheese selection even as you are trying to improve your technique. Personally I like using very firm cheeses but you can use whatever you like. I really enjoy a 50% extra sharp cheddar and 50% gouda mix. Parmesan and Gruyere are also common souffle cheeses. Well, look, let's get you walking before you start trying to run so let's talk about some basic tips before we get to the recipe.

Helpful Tips for Making Cheese Souffle at Home

  1. Prepare all of the ingredients and arrange all of the equipment you need before you do anything else. That is especially true for separating the egg and shredding the cheese. Souffle requires you to bounce from one step to the next while watching temperatures and mixing so the less time you spend between steps the less opportunity to mess it up. 
  2. Unless you are comfortable and experienced separating eggs by hand (or with the shell) then I strongly recommend that you use an egg separator to assist you with this step. It's important that you keep the yolk out of the egg whites and learning how to separate eggs using only the shell or your hand takes some practice. Although I can do it without the egg separator I still use this utensil as a backup. 
  3. Until you become comfortable separating the eggs, you may want to separate each egg into separate containers so if you screw up you only have to redo that one egg, rather than ruining several eggs' worth of whites. You can use one vessel to keep your egg whites and another bowl to separate them and then transfer the egg whites into the first vessel each time you get it right so you only need to use two bowls for the egg whites. Either is fine. 
  4. Older eggs separate easier than fresh eggs but the shells crumble easier. If you use eggs that have been in the fridge for a few days it's easier to separate them. Obviously don't use eggs that have gone bad!
  5. The way in which you add ingredients to each other and even how you mix them is very important. The instructions below are very specific about how you need to mix ingredients and it is critical to getting the right consistency. Remember, this is all about technique.
  6. If your roux sucks then start over. If you burn the roux or can't get it to mix then toss it and start over. A lumpy roux will make a lumpy souffle. The lumps are dried clumps of flour. You don't want that in your souffle.
  7. When whipping air into the egg whites you only need to go as far as forming "stiff peaks" which means it looks like the foam on ocean waves and stays in that shape. If you go too long the egg whites will turn into a meringue, which is firmer than you need and will end up making your souffle a little too dense. However, I would rather overshoot the egg whites than not get enough air whipped in.
  8. Read the entire recipe twice before you start cooking. Know what you are doing two steps ahead of where you are.
  9. Souffle is normally cooked in ceramic ramekins. This dish works best with 1 cup ramekins for individual servings but you can use almost any size. You can make the souffle as one large souffle but I think it's more fun to give each person their own souffle to break open. 
  10. If you do not have ceramic ramekins or a ceramic baking dish then basic coffee cups can work as a substitute. Souffle will rise in coffee cups but I do find part of what makes them stand up and form a nice browned crust is having enough volume rise above the top of the baking vessel. That's harder to do with coffee cups because they are taller and you need a lot more hot air inside the souffle to push the souffle up that tall. However, again, you can make perfectly tasty souffle that way.
  11. Whatever you bake the souffle in will be extremely hot. Be very careful taking them out of the oven and serving them. Ceramic retains heat very well. It is easy to burn yourself. Use oven mitts and pot holders to serve them. If you are using personal-size ceramic ramekins or coffee cups then consider serving them on a plate and offering the dinners a pot holder to keep it in place (or place the ramekin on a pot holder on a plate). 
  12. Generally one egg's worth of souffle in the recipe below will serve one person. Adjust the ingredients accordingly to make more or less. Souffles do survive until a later serving. If you have leftovers, allow them to cool and then cover with cling wrap. You can reheat them. They will not rise but it will still taste great with more of a casserole texture. I sometimes enjoy them the next day cold. They have some of a cheese bread texture that way. (Don't judge.)
  13. As you start to try to mix up ingredients, use flavor combinations you might find elsewhere. If you add a lot of unique herbs to your bechamel then think about how the cheese you choose will work with those flavors. Do you find other foods with those combinations? 
  14. When selecting cheeses, remember that you need cheeses that will create a nice cheese sauce. Cheddar or Gruyere are the standards for this purpose. Using only very hard or soft cheeses may not give you as pleasant of a texture. Mild cheddar is a good base for a cheese blend if you want a thick cheese sauce but let more interesting cheeses shine through.

Basic Cheese Souffle Recipe

Details

Serving: 4 people
Prep time: 15 minutes
Cook time: 45-60 minutes

Equipment Required

  • 4 one cup-size ceramic ramekins (or appropriate alternative)
  • 1 baking sheet (any size will work)
  • Oven mitts/pot holders
  • 3/4 quart saucepan
  • Hand mixer (or stand mixer)
  • Mixing bowls (keep as many as you have available)
  • Egg separator
  • Measuring cups and bowls
  • Grater (if your cheese is not pre-grated)
  • Rubber spatula
  • Small whisk
  • Kitchen utensils

 Ingredients

  • 4 eggs
  • 1 cup milk
  • 1/4 cup flour
  • 1/4 cup butter 
  • 1-2 tbsp butter
  • 1-1/2 cup cheese (cheddar cheese is a good starting point)
  • 1/4 tsp cream of tartar
  • 1/4 tsp cayenne pepper (optional)

Recipe Steps

  1. If you are not using pre-grated cheese, grate the cheese to a course grate. 
  2. Assemble all your ingredients and supplies.
  3. Separate the egg whites from the yolk. Place the yolks in a small bowl or measuring cup and set aside. The egg whites should go into a much larger bowl than the volume of egg whites as they will expand. If you are using a stand mixer then you can add them directly to the stand mixer's bowl.
  4. Preheat the oven to 350F.
  5. Coat the inside of your baking vessel(s) with the 1-2 tbsp of butter. You don't need a thick layer but the inside needs to be completely coated. This helps the souffle rise straight up. I find the easiest way to apply the butter is to put a small portion of barely warmed butter (like 5 seconds in the microwave) in the ramekin and work it around with my fingers. Make sure to get all the way up to the very top of the ramekin or whatever you are using. 
  6. Heat your saucepan to medium-low heat and add the 1/4 cup of butter. As soon as the butter is melted, add the 1/4 cup of flour. Whisk continuously. Break up lumps as they form and continue whisking until it you have a solid but wet lump of roux. You may have to whisk for several minutes. If the roux burns or gets too dry then start over.
  7. Heat the milk in the microwave until it is warm (30 seconds is usually enough). Remove a small portion of the roux and mix it into the milk until dissolved. Then add the milk-roux mix to the remaining roux and whisk until thoroughly dissolved. Reduce heat to low.
  8. Add a small amount of the white sauce to egg yolks and whisk until thoroughly mixed. Then add egg yolk mixture into the white sauce. Mix thoroughly. 
  9. Add the cayenne pepper to the sauce. Add the cheese to the sauce slowly, roughly 1/4 cup at a time. Thoroughly incorporate the cheese before adding more, allowing the heat to melt the cheese. If the cheese will not melt then turn the heat up to medium-low and continue mixing until the cheese melts. Repeat until the cheese sauce is completely mixed and smooth. If you turned the heat up to melt the cheese then turn it back down to low.
  10. Now you're going to turn the egg whites into a fluffy mix. Add the cream of tartar to the egg whites. Shove the mixer blades in the egg whites and turn it up to high. If the egg whites start flying out of the bowl then turn the mixer down. Keep mixing until the egg whites form stiff peaks. Then stop.
  11. Add 1/4 of the egg whites to the cheese sauce. Using a spatula, gently fold the egg whites into the cheese sauce. It does not need to be uniformly mixed. Repeat until all the egg whites have been folded into the cheese sauce.
  12. Gently spoon the souffle mix into the ramekins. Gently tap the ramekins on the counter to ensure the souffle mix has evenly settled and an even surface has formed. 
  13. Place ramekins on baking sheet and put in the oven. Bake for 30 minutes. Serve immediately after removing from the oven.